

If you find yourself daunted by beginning a email newsletter to your partnership team, you are not alone. I get numerous questions from workers wondering how to best set up snail mail and email newsletters.
One of the most popular services for electronic newsletters is Mailchimp. Mailchimp is a free online e-newsletter creator. Though Mailchimp is relatively easy to use, it does come with a learning curve even for more the more computer experienced of us out there. It uses language like “Campaigns” “Segments” and “Subscribers” that isn’t cut and dry for everyone. Thus, this post is a I-don’t-speak-Mailchimp step by step guide to sending your first e-newsletter. Keep in mind this post is for the beginners out there – I see you! Here we go friends.
Step 1: Get onto Mailchimp. If you haven’t already, create a username and password and login into Mailchimp.
Step 2: When you set up your account – click “Subscribe to Getting Started.” If you click this handy feature, Mailchimp will send you emails that will be helpful in creating future newsletters (in Mailchimp lingo these are called “Campaigns”).
Step 3: Build your List of people to send e-newsletters to.
A. Click “Lists”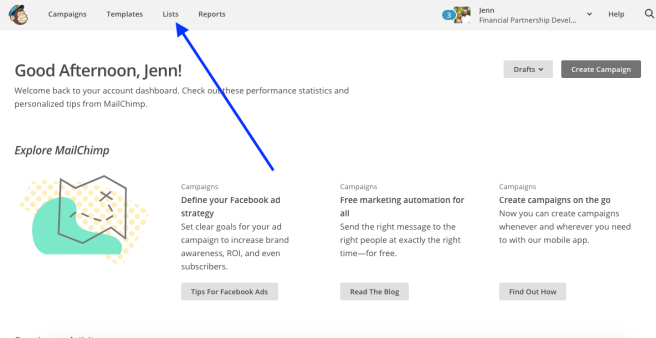 B. After clicking on Lists, click “Create List”.
 C. Fill in the List’s name, what email address you’ll be sending this from, your name, and other information needed.
D. Next, Mailchimp will pop up a screen that says “You have no contacts” and give you a choice to either “Import your subscribers” or “Create a signup form” to get started. Unless you have a blog you want to create a sign up form to get subscribers from – you will either want to import your contacts or click “Add contacts” (see screen shot below) and add them one by one manually.
Some people (like myself!) like to add them manually so there aren’t any glitches in the process of getting them from one program to another – but it does take time. So choose what works best for you.  ** If you do choose to import your contact list typically you’d either do so by .csv files (this is good if you keep your contacts organized on your computer using a program such as “Contacts” for Macs or “Address Book” for PCs) or by copy and pasting from a file (for instance from Excel). Either way you may have some cleaning up of your files to do, so be patient!
  E. When you are done importing or manually adding the subscribers to your List, you are ready to move onto Creating Your Campaign!
Step 4: Create Your Campaign!
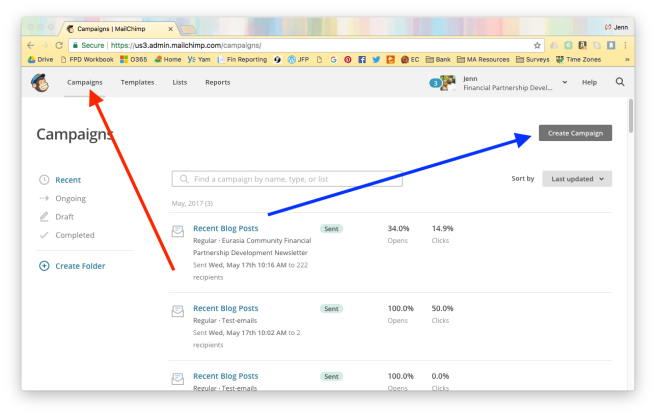
A. Start creating your campaign by clicking in the upper left hand corner “Campaign”.
B. If you have a new account, Mailchimp will take you to the screen below that says “What do you want to create?”. Choose “Create an Email”. (If you have an existing account click “Create Campaign” on the upper right corner of Mailchimp’s screen first, then the screen will ask “What do you want to create?” choose “Create an Email”.)
 C. Choose “Regular” for your email type. Choose a campaign name, then click “Next” at the bottom right of your screen.
D. Choose the List you are sending your Campaign to. This should be the List you just made in Step 3. Then, click “Next” on the bottom right of your screen.
E. Fill in your Campaign Info. Make sure when filling this out to chick “Personalize the To Field” so your subscribers get emails addressed to them personally. When you are finished click “Next” on the bottom right of your screen.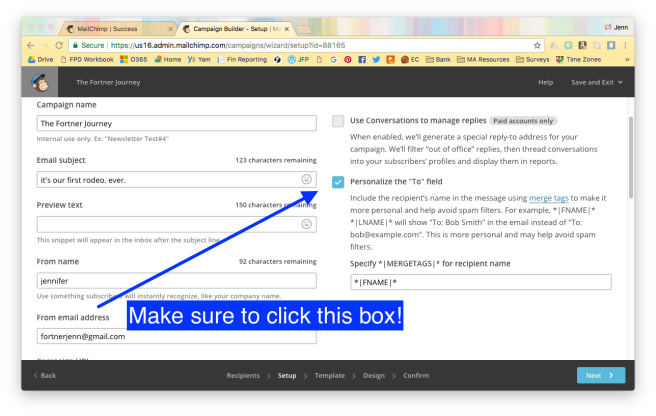 F. Now it’s time to select a Template. There are a lot of pre-made templates out there that are great! If you’d like to go the easy route click “Themes” and explore until you find one that works for you. If you want to choose a Layout and build the template yourself go for it! Simply click “Layout” and choose the one that works best for you. You’ll spend some time custom making your Template by choosing design and content elements. (Mailchimp also has a couple of helpful links in the Layout feature that will help you get started).
  G. Now that you’ve chosen and designed your Template, it’s time to actually put together your newsletter. When you create your newsletter, you can choose to add some of the elements on the left side as you wish (such as additional text, images, graphs, etc.). To do so simply drag and drop where you want the element to the right side of your screen onto your existing Template.
 H. When you are done creating your newsletter and carefully writing your text, I recommend previewing your Campaign and sending a test email to yourself first – so you can make 100% sure your e-newsletter is awesome!
 Step 5: Send Your Campaign and Your DONE!
Now that your done – click “Send”. You have successfully sent your first e-newsletter using Mailchimp. Congrats!

I hope this tutorial is a help to those who don’t speak Mailchimp. Godspeed and good luck my friends, and may your future e-newsletters be awesome.
If you want more information on how what content to include in your newsletter, go to this previous post I did on the subject.
*Mailchimp will NOT create a PDF version of any Campaigns you create, so you CANNOT send snail mail newsletters using Mailchimp. My suggestion is to use a service like Mailchimp for e-newsletters and create a snail mail newsletter in another program – and make them similarly branded and cohesive.

Jenn,
I tried monkey-mail and found it too confusing and I did not like that you had to use a template. I’ve been using mail designer and really like it and find it very easy to use to create custom newsletters every time.
Blessings… Chris
ICAW . *”It has always been my *(holy) *ambition to preach the gospel where Christ was not known…”* -Rom 15:20
On Fri, Sep 8, 2017 at 5:23 PM, Financial Partnership Development wrote:
> Jenn Fortner posted: “If you find yourself daunted by beginning a email > newsletter to your partnership team, you are not alone. I get numerous > questions from workers wondering how to best set up snail mail and email > newsletters. One of the most popular services for electronic” >
LikeLiked by 1 person
good to know Chris! I think there are a lot of great programs out there I’m just discovering.
LikeLike